
[SpringBoot] Multipart 파일 Upload & Download

이번 포스팅에서는 Spring Boot에서 Request로 Multipart 형식의 File을 받아, 서버 내부 스토리지에 저장하는 방법과, 스토리지에 저장된 파일을 Response로 출력하는 과정을 다루어보도록 하겠다.
업로드 파일 저장 디렉터리 생성
▶ Application.java
@SpringBootApplication
public class WisefeeApplication {

	@Value("${upload.directory}")
	private String uploadDirectory;


	public static void main(String[] args) {
		SpringApplication.run(WisefeeApplication.class, args);
	}

	@PostConstruct
	public void init() {
		File directory = new File(uploadDirectory);
		if (!directory.exists()) {
			directory.mkdirs(); // 디렉터리 생성
		}
	}

}
우선 업로드한 파일을 서버 내부 스토리지에 저장하기 위해서, App 실행 시 디렉터리를 생성해주는 로직을 추가해준다.
파일 업로드
▶ FileApiController.java
@RestController
@RequestMapping("/api/v1/file")
@RequiredArgsConstructor
public class FileApiController {
    private final FileService fileService;

    @PostMapping(value = "",
            consumes = MediaType.MULTIPART_FORM_DATA_VALUE, produces = MediaType.APPLICATION_JSON_VALUE)
    public ResponseEntity<Long> addFile(
            @ApiParam(value = "multipart/form-data 형식의 이미지")
            @RequestPart("multipartFile")
            MultipartFile file) {
        Long memberPK = SecurityUtil.getCurrentMemberPk();
        FileInfoDto fileinfo = fileService.uploadFile(file);	//서버 내부 스토리지 저장
        Long success = fileService.insertFileInfo(fileinfo, memberPK);	//데이터베이스에 파일 정보 저장

        return ResponseEntity.status(HttpStatus.OK).body(success);
    }
}
컨트롤러에서 Multipart 파일을 Request로 받으려면 @RequestPart("multipartFile")과 함께 MultipartFile file을 파라미터로 넣어주면 된다.
해당 과정은, 받은 Multipart 파일을 서버 내부에 스토리지에 저장하고 그 결과로 나온 파일 정보를 데이터베이스에 저장하는 과정을 거치게 된다.
▶ FileService.java
    /**
     * [파일 업로드]
     * Multipart 파일을 입력받아 서버 내부 스토리지에 저장.
     * @param [MultipartFile 파일]
     * @return [FileinfoDto 파일 정보]
     */
    @Transactional()
    public FileInfoDto uploadFile(MultipartFile file){

        String originalFileName = file.getOriginalFilename();
        String mimeType = file.getContentType();

        //최대용량 체크
        if (file.getSize() > FileConstant.MAX_FILE_SIZE) {
            throw new FileUploadException("10MB 이하 파일만 업로드 할 수 있습니다.");
        }


        //MIMETYPE 체크
        if (!FileUtil.isImageFile(mimeType)) {
            throw new FileUploadException("이미지 파일만 업로드할 수 있습니다.");
        }

        //저장 파일명을 중복방지 고유명으로 변경
        String newFileName = generateUniqueFileName(originalFileName);
        Path filePath = Paths.get(uploadDirectory + File.separator + newFileName);


        //서버 내부 스토리지에 업로드
        try {
            Files.copy(file.getInputStream(), filePath);
        } catch (IOException e) {
            throw new FileUploadException("File upload exception. " + e.getStackTrace());
        }

        return new FileInfoDto(file.getContentType(),
                file.getOriginalFilename(),
                filePath.toString(),
                Long.toString(file.getSize()));
    }


    /**
     * [중복방지를 위한 파일 고유명 생성]
     * @param fileExtension 확장자
     * @return String 파일 고유이름
     */
    private String generateUniqueFileName(String originalFileName) {
        SimpleDateFormat dateFormat = new SimpleDateFormat("yyyyMMddHHmmss");
        // Random 객체 생성
        Random random = new Random();
        // 0 이상 100 미만의 랜덤한 정수 반환
        String randomNumber = Integer.toString(random.nextInt(Integer.MAX_VALUE));
        String timeStamp = dateFormat.format(new Date());
        return timeStamp + randomNumber + originalFileName;
    }
실제로 서버 내부 스토리지에 파일 업로드를 하는 과정이다.
파일 정보 추출: 업로드된 파일에서 원본 파일 이름(originalFileName)과 파일의 MIME 타입(mimeType)을 추출한다.
용량 및 MIME 타입 체크: 파일의 크기가 특정 용량 제한(FileConstant.MAX_FILE_SIZE)을 초과하는지 및 MIME 타입이 이미지인지 여부를 검사하여. 파일 크기가 제한을 초과하면 예외를 발생시키고, 이미지 파일이 아니면 예외를 발생시킨다.
고유한 파일 이름 생성: 중복된 파일 이름을 방지하기 위해 고유한 파일 이름을 생성한다.
파일 저장: 서버 내부 스토리지에 업로드된 파일을 저장한다. 이때, Files.copy 메서드를 사용하여 클라이언트로부터 받은 파일 내용을 서버에 저장한다.
파일 정보 반환: 업로드된 파일의 정보를 담은 FileInfoDto 객체를 생성하여 반환한다. 이 객체에는 MIME 타입, 원본 파일 이름, 저장된 파일 경로, 파일 크기 등의 정보가 포함된다.
파일 다운로드
▶ FileApiController.java
@RestController
@RequestMapping("/api/v1/file")
@RequiredArgsConstructor
public class FileApiController {
    private final FileService fileService;

    @PostMapping(value = "",
            consumes = MediaType.MULTIPART_FORM_DATA_VALUE, produces = MediaType.APPLICATION_JSON_VALUE)
    public ResponseEntity<Long> addFile(
            //...
    }


    @GetMapping("/{id}")
    public ResponseEntity<byte[]> getImage(@PathVariable Long id){
        // ID를 통해 이미지 파일의 경로를 얻어옴
        FileInfoDto info = this.fileService.getImageInfoById(id);
        Path imagePath = Paths.get(info.getFilePath());
        String mimeType = info.getFileType();

        // 이미지 파일을 바이트 배열로 읽어옴
        byte[] imageBytes = this.fileService.getImageFile(imagePath);

        return ResponseEntity.status(HttpStatus.OK)
                .contentType(MediaType.valueOf(mimeType))  // 이미지 타입에 맞게 설정
                .body(imageBytes);

    }


}
업로드한 파일은 경로와 MIMETYPE 등을 포함하여 데이터베이스에 저장되어 있는 상태이다.
다음은 저장한 이미지를 PK를 통해서 파일정보를 검색한 후 이미지 자체를 Response로 반환하는 컨트롤러를 작성한 내용이다.
▶ FileService.java
    /**
     * [경로를 기반으로 이미지 바이트 스트림 반환]
     * 해당 경로의 이미지의 바이트 스트림 형태를 얻음
     * @param [Path 파일 경로]
     * @return [byte[] 이미지 바이트 배열]
     */
    @Transactional
    public byte[] getImageFile(Path path){
        try {
            byte[] imageBytes = Files.readAllBytes(path);
            return imageBytes;
        } catch (IOException e) {
            throw new FileDownloadException("File download fail." + e.getMessage());
        }
    }
이미지 파일 읽기: 주어진 파일 경로를 사용하여 해당 이미지 파일을 읽어와서 바이트 배열(byte[] imageBytes)로 변환한다.
Files.readAllBytes를 사용하여 이미지 파일을 읽어오면 이미지 데이터가 바이트 배열로 저장된다.
바이트 배열 반환: 이미지 파일을 읽고 바이트 배열로 저장한 후, 이 바이트 배열을 반환한다.
결과 확인
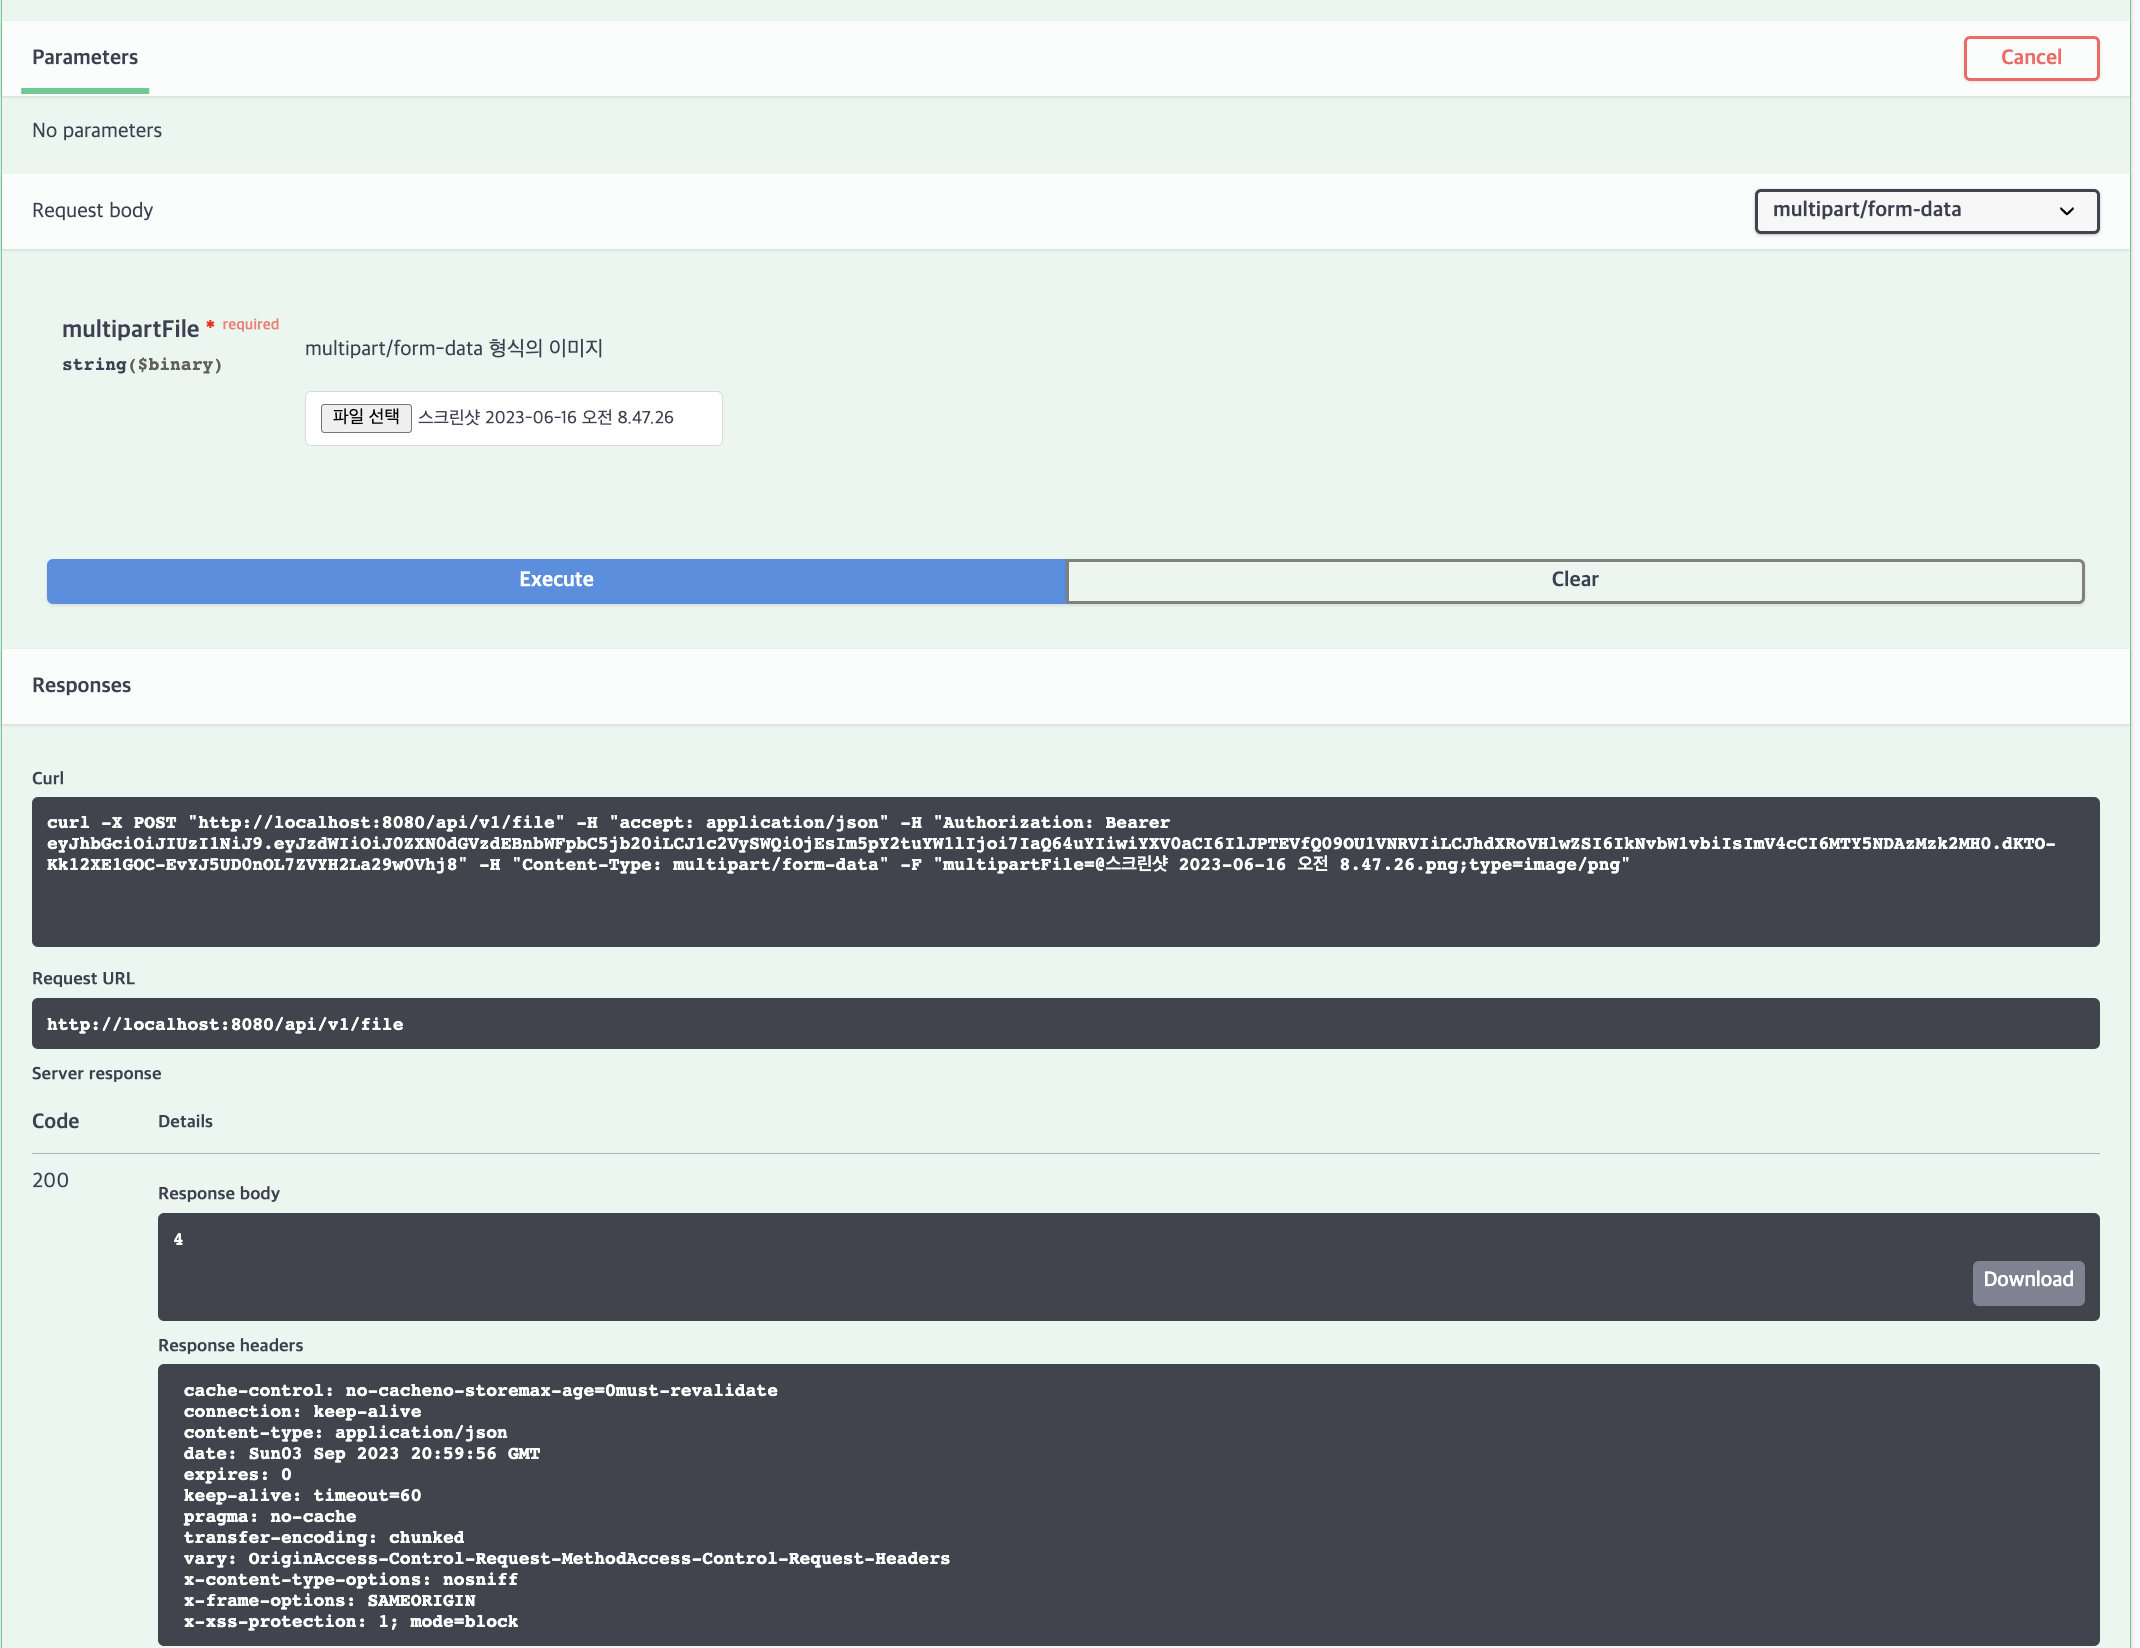
이미지 파일 업로드
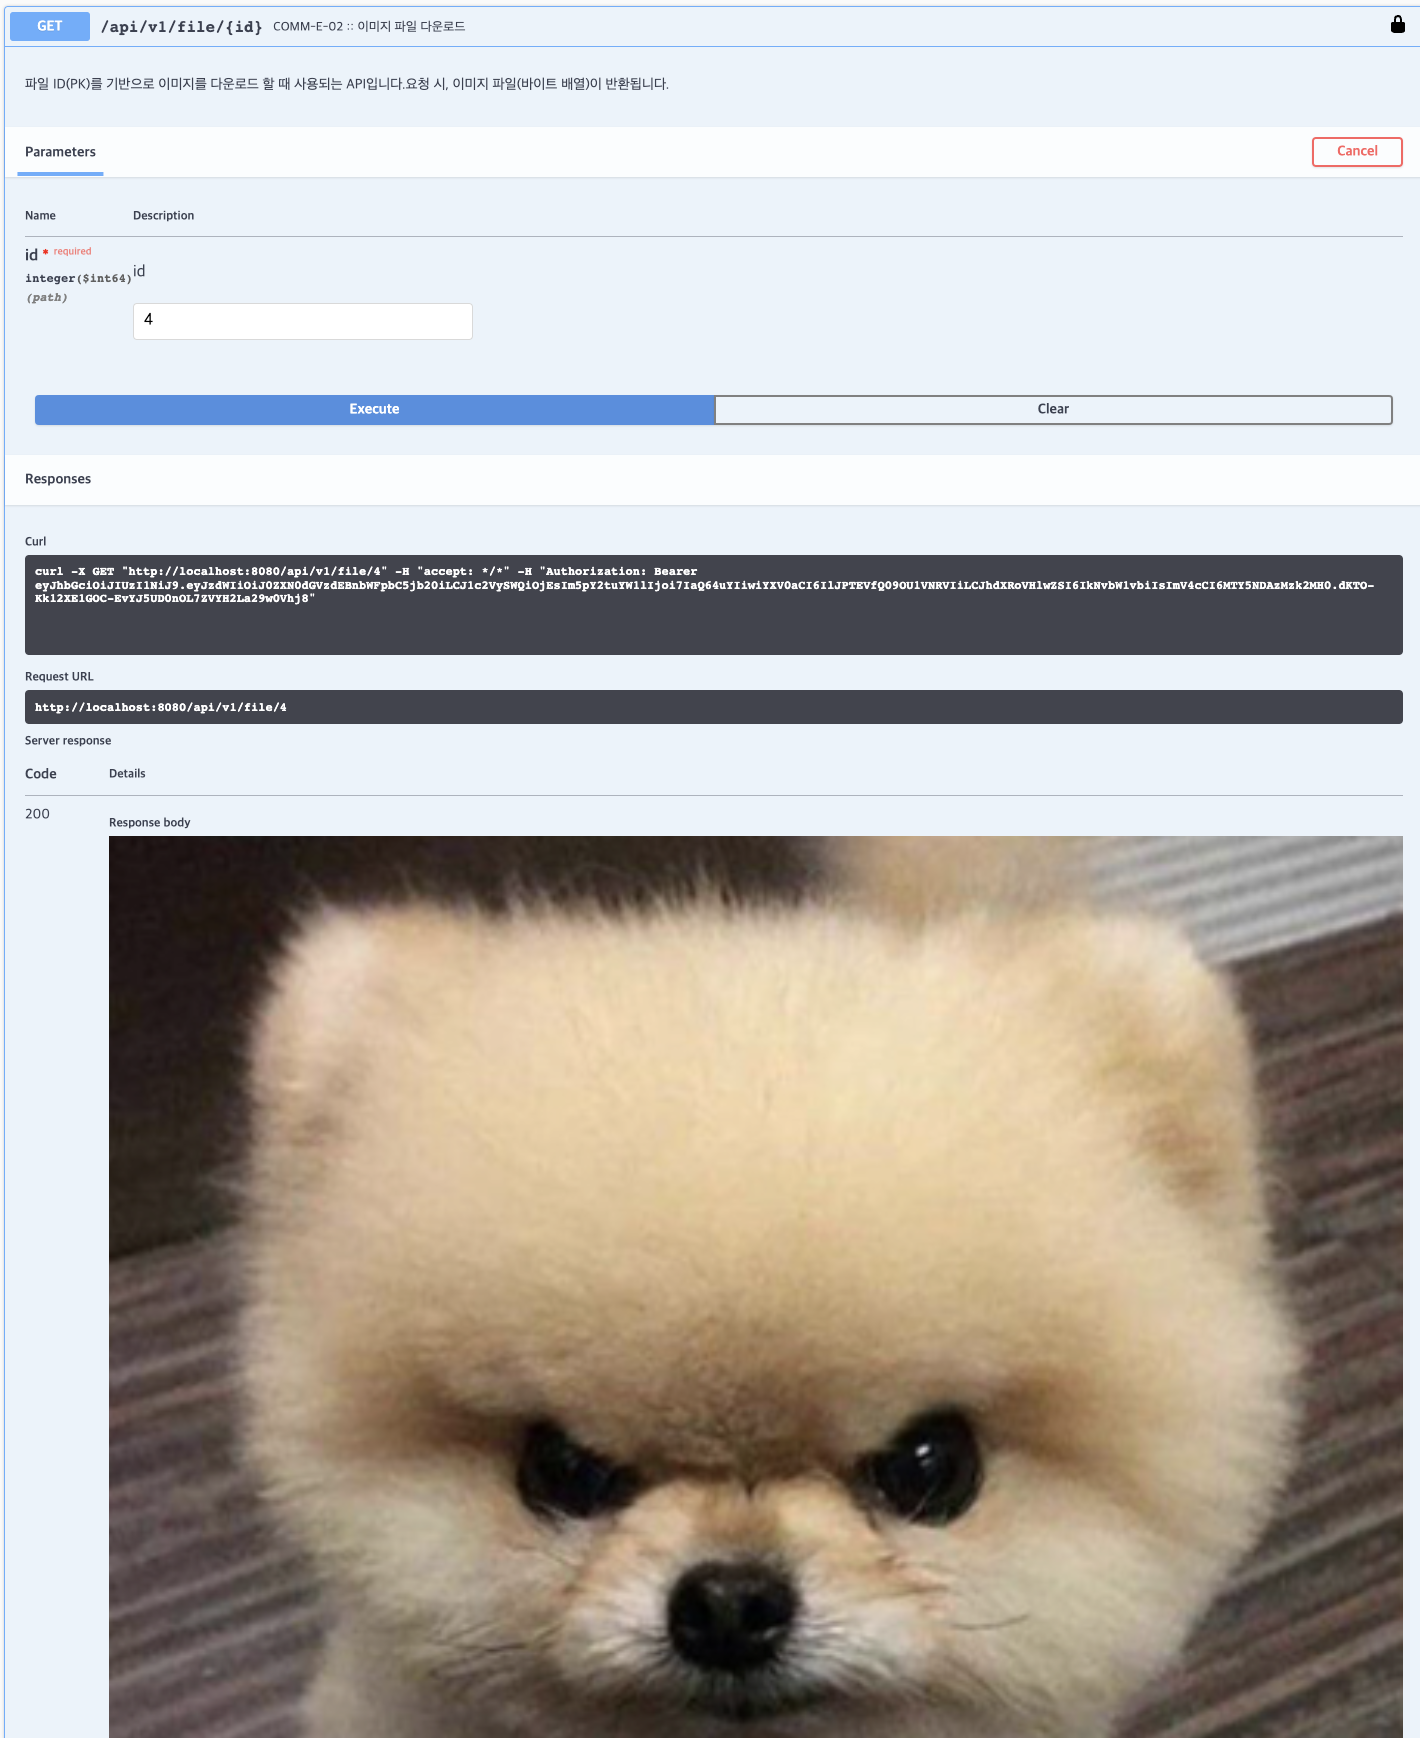
이미지 파일 다운로드
<함께 보기> [AWS + Spring] S3 : 파일 업로드 & 다운로드 (개발 및 프로덕션 환경 연동)
https://sjh9708.tistory.com/259
[AWS + Spring] S3 : 파일 업로드 & 다운로드 (1) (개발 및 프로덕션 환경 연동 기본)
이번 포스팅에서는 기존 Local Stroage를 이용하여 파일 업로드 및 다운로드 API를 제공하던 Spring Application에 S3를 연동하는 작업을 해보도록 하겠다. 개발 환경에서의 S3 연동, EC2 프로덕션 환경에서
sjh9708.tistory.com
'Backend > Spring' 카테고리의 다른 글
| [Spring Boot/JPA] JPQL : 지연 로딩과 N+1 문제 해결 (1) | 2024.01.08 |
|---|---|
| [Spring Boot] DI/IoC의 개념, Bean 등록 및 의존성 주입 방법들 (3) | 2023.12.02 |
| [SpringBoot] Spring Security : JWT Auth + Redis 적용하기 (Stateful vs Stateless에 대한 고민) (0) | 2023.08.28 |
| [SpringBoot] Spring Security JWT 인증과 인가 - (3) API 인가 (Authorization) (0) | 2023.08.14 |
| [SpringBoot] Spring Security JWT 인증과 인가 - (2) 로그인 인증 (Authentication) (0) | 2023.08.14 |